
Safety 1st Gate Manual: A Comprehensive Guide
This comprehensive guide details installation, troubleshooting, and safety for Safety 1st gates (GA105, GA108, GA109).
Ensure secure installation
to prevent serious injury or death, following manufacturer’s instructions carefully.
Understanding Safety 1st Gate Models
Safety 1st offers a diverse range of gates designed for various openings and safety needs. Key models include pressure-fit gates (like Argos 913/9934), walk-thru gates (available on Amazon), and adaptable gates utilizing extensions – GA105, GA108, and GA109 are common identifiers.
The “Contemporary Tall and Wide Gate” is highlighted in YouTube installation guides, showcasing a model designed for broader spaces. Understanding your specific gate type is crucial for correct installation. Different models employ varying mechanisms, from pressure mounting to hardware-secured hinges. Always refer to the specific manual for your gate, as instructions differ significantly between pressure-fit, walk-thru, and extension-equipped versions. Proper identification, using the model and date code, ensures you access the correct guidance.
Identifying Your Gate Model Number (GA105, GA108, GA109)
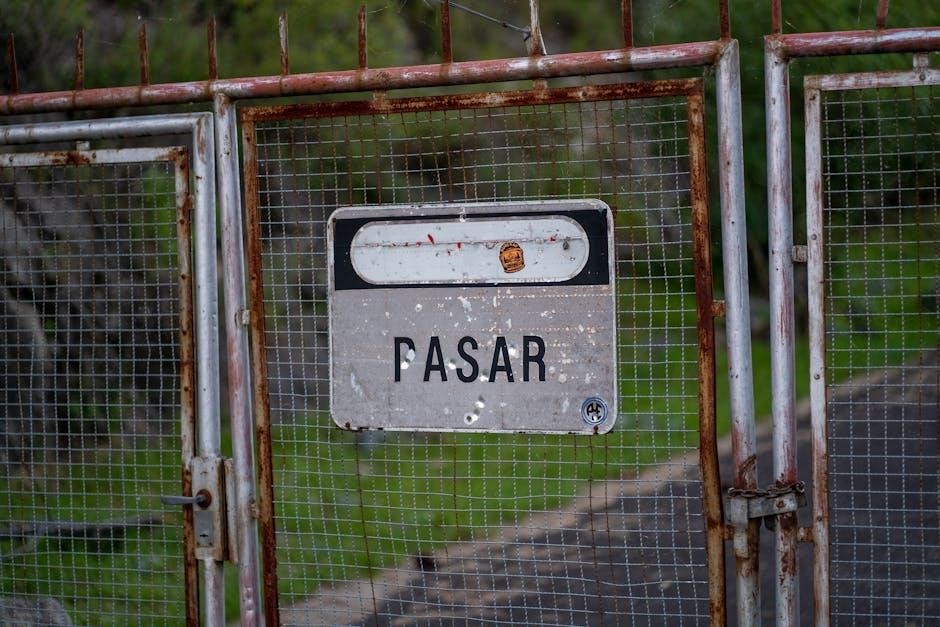
Locating your Safety 1st gate’s model number is the first step towards successful installation and troubleshooting. Common model numbers include GA105, GA108, and GA109, but variations exist. This number is essential for accessing the correct installation instructions and support resources.
The model number, along with the date code (manufacture date), is typically found on a label affixed to the inside of the gate panel. Carefully inspect all sides of the gate frame. Having this information readily available when visiting Safety 1st’s official website or seeking assistance will streamline the process. Accurate identification ensures you’re following the procedures specific to your gate’s design and features.
Locating the Date Code (Manufacture Date)
Determining your Safety 1st gate’s manufacture date is crucial for verifying warranty eligibility and accessing the most relevant support documentation. The date code, like the model number (GA105, GA108, GA109), is typically located on a label inside the gate panel.
This code often appears as a numerical sequence indicating the year and week of manufacture. Having both the model number and date code prepared before contacting customer support or consulting online resources, such as Safety 1st’s website, will expedite assistance. Knowing the manufacture date helps ensure you’re using the correct installation guides and addressing any potential issues specific to your gate’s production timeframe.

Installation Process: Core Steps
Begin with a component check, then follow the specific instructions for pressure fit, walk-thru, or extension installations, ensuring a secure and properly functioning safety gate.
Initial Setup and Component Check
Before beginning installation, carefully unpack all components and verify everything listed in the manual is present. This includes the gate itself, mounting hardware (screws, wall cups for pressure mounting), and any purchased extensions. Locate your gate’s model number (GA105, GA108, GA109) and date code – found on the inside of the gate panel – as you may need this information for support or replacement parts.
Inspect all parts for damage. Do not proceed if anything is broken or missing. Familiarize yourself with the different components and how they connect. Refer to the diagrams in the instruction manual for visual guidance. Ensure you understand the function of each part before attempting assembly. A thorough component check is crucial for a safe and secure installation, preventing potential hazards later on;
Using Extensions for Wider Openings
Safety 1st gates often require extensions for wider doorways or hallways. These extensions are sold separately and are crucial for maintaining gate stability and security. Determine the number of extensions needed to achieve a snug fit within your opening. Use two extensions and proceed to steps 2a-2d, or use one extension and follow steps 2a-2c, as outlined in the installation guide (Safety 1st GA106WHO1, GA099WHO1).
Ensure extensions are securely connected to the main gate frame, following the provided instructions precisely. Improperly installed extensions compromise the gate’s effectiveness. Always double-check connections before use. Remember to repeat steps with each extension on either side of the gate for balanced support and optimal safety.
Installing with Two Extensions (Steps 2a-2d)
When utilizing two extensions, begin by attaching the first extension to the gate frame, ensuring a firm and secure connection. Step 2a involves aligning the extension with the gate’s mounting points and locking it into place. Step 2b requires repeating this process on the opposite side of the gate with the second extension.
Steps 2c and 2d focus on final adjustments and stability checks. Verify that both extensions are level and securely fastened, preventing any wobbling or shifting. A stable connection is paramount for safety. Refer to the Safety 1st manual (GA106WHO1, GA099WHO1) for detailed diagrams and specific instructions related to your gate model. Always prioritize a secure installation to prevent potential hazards.
Installing with One Extension (Steps 2a-2c)
For installations requiring a single extension, the process begins similarly to using two. Step 2a involves securely attaching the extension to one side of the gate frame, aligning it precisely with the designated mounting points. Ensure a robust connection, as this extension will bear a significant portion of the gate’s stability.
Step 2b requires verifying the extension’s alignment and tightness. Step 2c focuses on final adjustments, ensuring the gate remains level and stable when pressure is applied. Consult the Safety 1st guide (GA106WHO1, GA099WHO1) for visual aids. Prioritize a secure fit; a wobbly gate compromises child safety. Remember to check the model number and date code!

Pressure Fit Gate Installation (Argos 913/9934)
Argos product 913/9934 utilizes a pressure-fit mechanism for installation. This method requires careful attention to ensure a secure and stable gate, preventing accidents.
Mounting the Gate – Pressure Fit Mechanism
The Safety 1st pressure fit gate, specifically the Argos 913/9934 model, relies on strategically applied pressure against the doorway frame for stability. Begin by extending the side spindles to match the width of the opening, ensuring a snug fit.
Carefully position the gate within the desired opening, and then gradually increase the pressure by tightening the adjustment knobs or mechanisms located on the spindles. It’s crucial to verify that both spindles are evenly tightened to distribute the pressure uniformly.
Important: Regularly check the pressure fit, as adjustments may be needed over time due to natural settling or vibrations. Avoid excessive force when tightening, as this could damage the gate or the surrounding frame. A properly installed pressure fit gate should be firmly in place and resist moderate force without dislodging.
Ensuring Secure Installation – Key Checks
After installing your Safety 1st gate, rigorous checks are vital for child safety. First, firmly test the gate’s stability by applying moderate pressure to all sides – it shouldn’t budge or flex significantly. Verify the locking mechanism engages smoothly and securely, preventing accidental opening.
Inspect the spindles (for pressure-fit gates) to confirm they maintain consistent, even pressure against the wall or frame. Ensure there are no gaps between the gate and the surrounding structure.

Crucially, regularly re-evaluate these checks, especially after any adjustments or if the gate experiences impact. Remember, a secure installation is paramount to preventing serious injury or death, and diligent monitoring is essential for ongoing safety.

Walk-Thru Gate Installation (Amazon Models)
Specific instructions are needed for Amazon Safety 1st walk-thru gates, focusing on doorway installation and width adjustments for an optimal, secure fit.
Doorway Gate Installation – Specific Instructions
Installing a Safety 1st walk-thru gate for doorways requires careful attention to detail. Begin by identifying your specific Amazon model, as instructions can vary slightly. Ensure the gate’s width is appropriately adjusted to fit the doorway opening securely.
Typically, these gates utilize a pressure-fit or hardware-mounted system. For pressure-fit models, firmly push the gate into the opening until the locking mechanism engages, verifying a snug fit. Hardware-mounted gates necessitate drilling and screwing mounting cups into the doorframe for enhanced stability.
Always double-check that the gate swings freely and the locking mechanism functions correctly. A properly installed gate should resist significant force and prevent accidental opening by a child. Refer to the included manual for diagrams and model-specific guidance. Remember, a secure installation is paramount for child safety.
Adjusting Gate Width for Optimal Fit

Achieving a secure fit with your Safety 1st gate often requires precise width adjustment. Many models, particularly those designed for doorways, feature adjustable spindles or extensions. Carefully examine the gate’s mechanism to identify the adjustment points.
Loosen any locking screws or clamps before extending or retracting the gate’s side rails. Ensure both sides are adjusted equally to maintain a level and stable installation. Regularly check the width, especially after initial installation or any adjustments, to confirm it remains snug against the surrounding surfaces.
Proper adjustment prevents gaps where a child could potentially squeeze through. A well-fitted gate should resist pressure and remain firmly in place, providing a reliable barrier. Consult your gate’s manual for specific instructions related to your model.

Safety Precautions & Warnings
Secure installation is crucial to prevent serious injury or death. Always follow manufacturer instructions for proper usage and child protection, ensuring a safe environment.
Preventing Serious Injury or Death – Secure Installation
Prioritizing secure installation is paramount when utilizing a Safety 1st gate. Incorrect installation significantly increases the risk of falls and potential harm to children.
Always verify the gate is firmly mounted, whether employing a pressure-fit or hardware-mounted system.
For pressure-fit gates (like Argos 913/9934), meticulously check for secure engagement with the wall or doorway. Ensure the locking mechanism functions flawlessly, preventing accidental opening.
With extension kits, confirm each extension is correctly connected and locked into place, following steps 2a-2d or 2a-2c as applicable.
Regularly inspect the gate for any signs of damage or loosening. Never compromise on safety; a compromised gate should be immediately repaired or replaced.
Remember, a properly installed gate is a vital component of a childproof home, safeguarding against preventable accidents.
Proper Usage for Child Protection
Effective child protection relies not only on correct installation but also on consistent, proper usage of the Safety 1st gate. Always engage the locking mechanism after passing through, ensuring it clicks securely into place. Regularly demonstrate to all caregivers how to operate the gate correctly.
Never attempt to modify the gate or use it in a manner not intended by the manufacturer. Avoid placing flammable materials near the gate, and refrain from hanging objects from it, as this could compromise its stability.

Supervision remains crucial, even with a gate installed. Gates are a safety tool, not a substitute for attentive childcare. Teach older children not to tamper with the gate or attempt to climb over it. Consistent adherence to these guidelines maximizes the gate’s protective capabilities.

Troubleshooting Common Issues
Common problems include locking difficulties and extension installation challenges. Refer to the manual and online resources for solutions, ensuring a secure gate.
Gate Not Locking Properly
A gate that fails to lock presents a significant safety hazard, potentially allowing a child access to restricted areas. First, verify proper installation; a misaligned gate won’t engage the locking mechanism correctly. Inspect the locking components themselves for any visible damage or obstructions – debris can often interfere with smooth operation.
Ensure the gate is fully latched after closing. Some models require a firm push to fully engage. If the issue persists, check the alignment of the gate frame with the mounting hardware. Loose screws or a warped frame can cause misalignment. Tighten all screws securely.
Consult the Safety 1st website (www.safety1st.com) for model-specific troubleshooting guides and diagrams. YouTube installation videos, particularly for the Contemporary Tall and Wide Gate, may offer visual assistance. If the locking mechanism remains faulty, discontinue use and contact Safety 1st customer support for assistance or replacement parts.
Extension Installation Difficulties
Installing extensions correctly is crucial for a secure gate setup, especially for wider openings. Difficulty often arises from ensuring proper alignment and secure attachment. Begin by double-checking compatibility – use only Safety 1st extensions designed for your specific gate model (GA105, GA108, GA109).
Follow the instructions carefully, whether using one or two extensions (refer to steps 2a-2d or 2a-2c in the manual). Ensure extensions are firmly clicked or screwed into both the gate and the wall/door frame. Verify the gate remains stable and doesn’t wobble after extension installation.
If encountering resistance, avoid forcing the extension – this could damage the components. Review the Safety 1st website (www.safety1st.com) or YouTube installation guides for visual demonstrations. If problems persist, discontinue installation and contact Safety 1st support for guidance.
Resources & Support
For assistance, visit the Safety 1st official website (www.safety1st.com) or view YouTube installation guides, like the Contemporary Tall and Wide Gate tutorial.
Safety 1st Official Website (www.safety1st.com)
The Safety 1st website (www.safety1st.com) serves as a central hub for comprehensive product information, support resources, and crucial safety updates related to all their baby and toddler safety items, including their range of gates. Here, you can directly access downloadable instruction manuals for specific gate models – such as those with extensions (GA106WHO1, GA099WHO1) – ensuring you have the correct guidance for your particular setup.
Beyond manuals, the website often features frequently asked questions (FAQs) addressing common installation challenges and troubleshooting tips. You’ll find details on identifying your gate’s model number and date code (manufacture date), vital information when seeking assistance. The site also provides contact information for customer support, allowing you to directly reach out with specific queries or concerns regarding your Safety 1st gate. Regularly checking the website ensures you’re aware of any product recalls or safety alerts.
YouTube Installation Guides (Contemporary Tall and Wide Gate)
Safety 1st’s official YouTube channel hosts valuable video guides, particularly for the “Contemporary Tall and Wide Gate”. These visual tutorials complement the written manuals, offering a step-by-step demonstration of the installation process. The videos clearly illustrate how to properly assemble the gate, utilize extensions (for wider openings), and ensure a secure fit – crucial for preventing serious injury or death.
These guides are especially helpful for visualizing complex steps, such as attaching extensions (steps 2a-2d) or understanding the pressure-fit mechanism (Argos 913/9934). The November 16, 2023 video provides a detailed walkthrough, transforming your home into a safer environment for your baby. By following along with the video, you can confidently install the gate and verify its functionality, ensuring optimal child protection and peace of mind.